


Educational Resources
Find available museum resources from online exhibitions, virtual learning, on-site experiences, and more.
Last Minute Lesson Plan: Jacob's Ladder
By: Jennifer Lee, History and Art Education Manager
Gather up the ribbon and glue, it's time for Last Minute Lesson Plan on how to make a Jacob's Ladder!
Although kids in colonial times didn’t have the fancy and fabulous toys we do now, they did have some playthings that have stood the test of time. Jacob’s Ladder – one of the few trinkets allowed on Sunday – still manages to wow kids of all ages. How *does* it do that?!?!
Grade Levels: This activity can be a great, hands-on addition to learning about colonial life for grades 3 - 5.
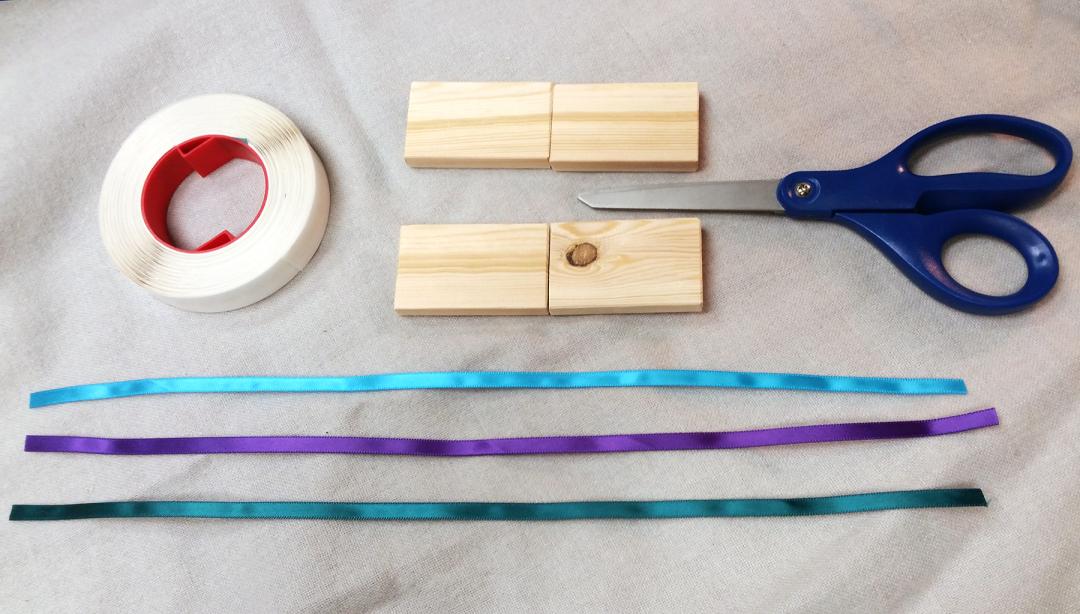
Materials: 4 small blocks of wood, measuring 2 ½” x 1 ½” x 1/2” each 3 different colors of ribbon, measuring 15” x ½” each Super tacky glue dots, ½” each Scissors
Now that you have your materials, just follow the steps below:
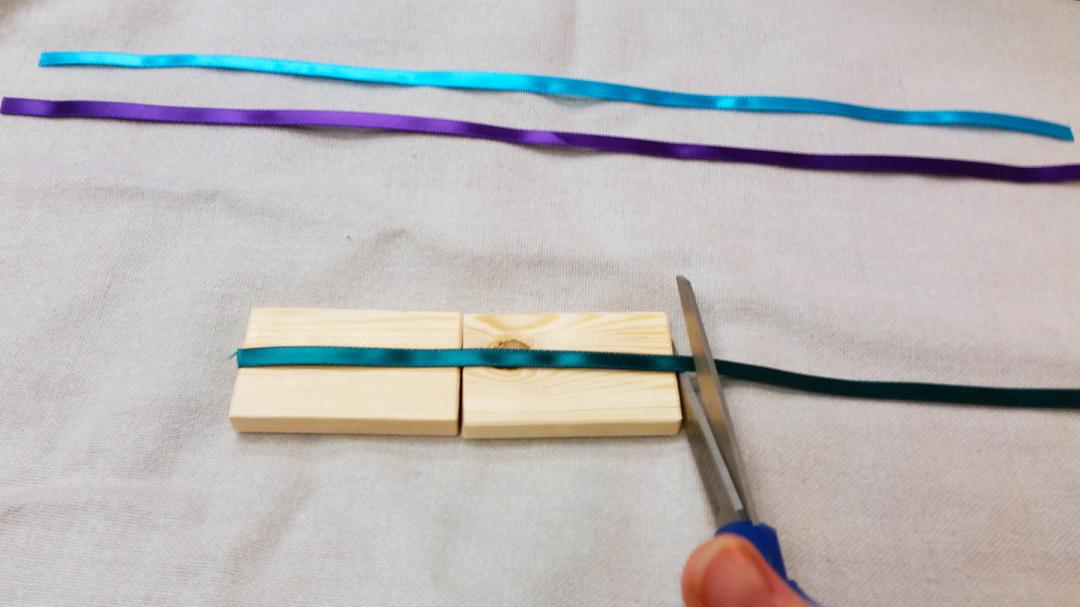
Cut each ribbon into 3 strips – each the length of two blocks put together lengthwise. You should end up with 9 ribbons total.
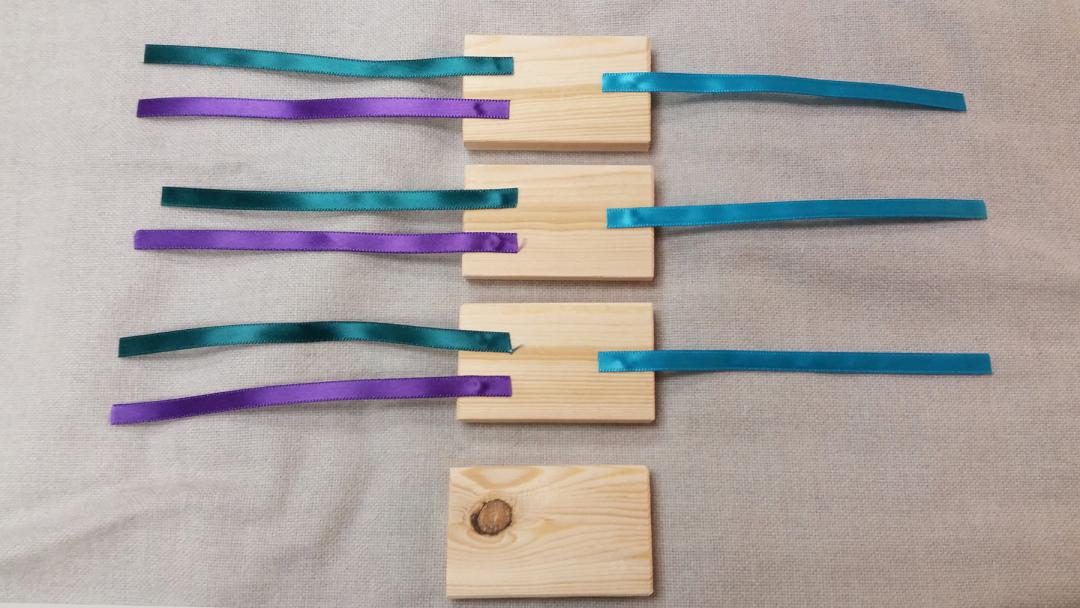
Take one block and stick three ribbons to it using the glue dots. Two on the left and one on the right.
Do the same with two more blocks. When finished, you should have three blocks with ribbons and one without.
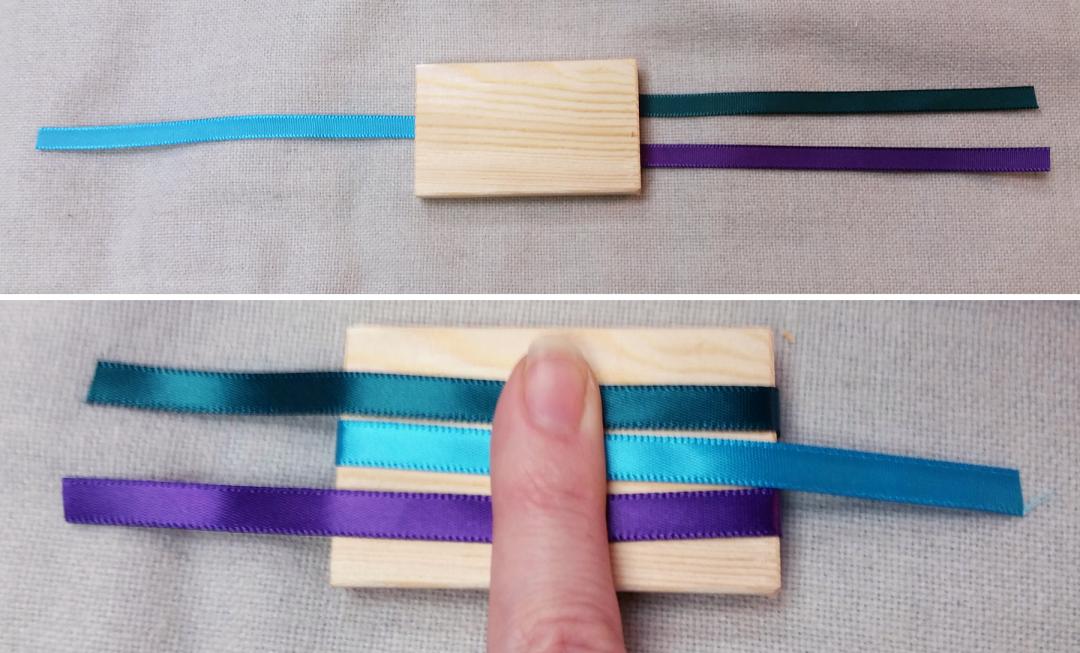
Take one of the be-ribboned blocks, and turn it so that the plain side is facing up. (Top Image)
Cross each of the ribbons over the length of the block. (Bottom Image)
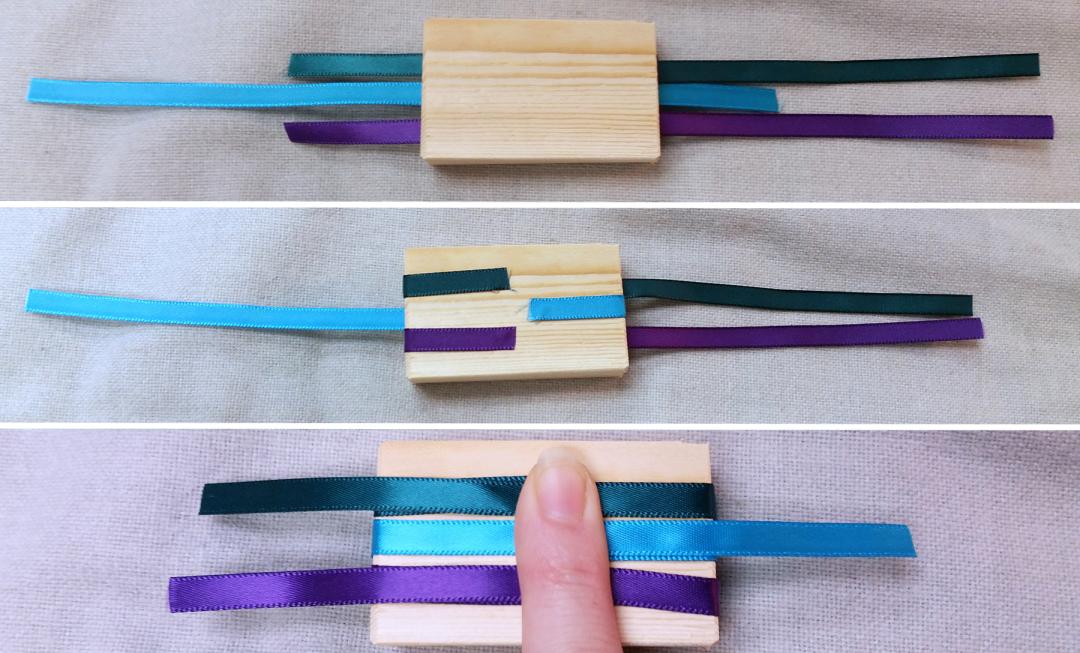
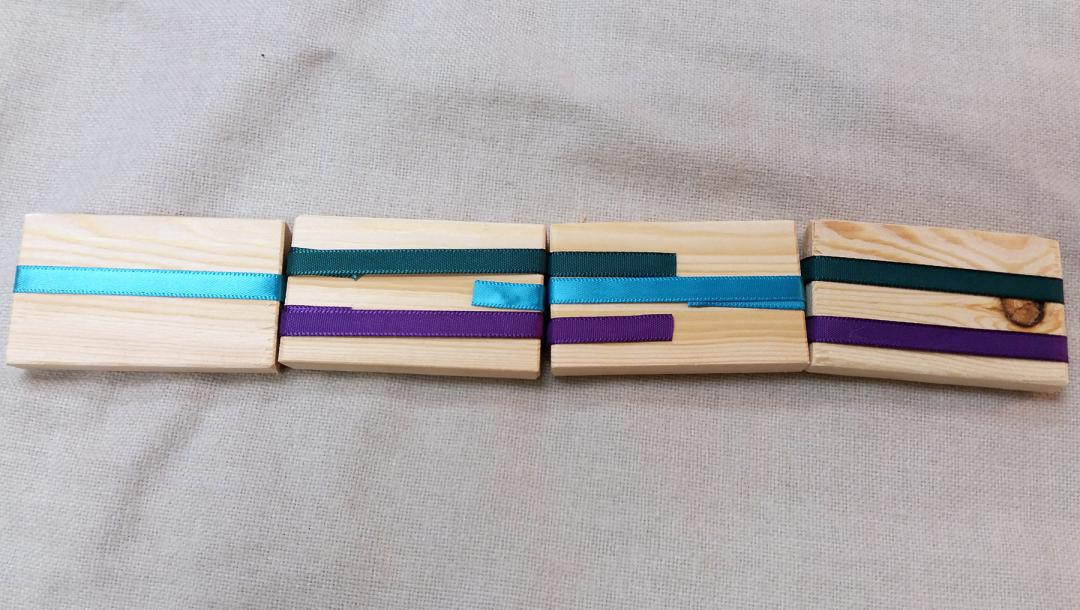
Place another be-ribboned block on top of the first, plain side up, making sure that the two long ribbons are on the side with the one short ribbon – and the one long ribbon on the side with the two short. (Top Image)
Pull the short ribbons tight and fasten each end on top of the block with glue dots. Make sure the two blocks are aligned perfectly. (Middle Image)
Cross the long ribbons over the block. (Bottom Image)
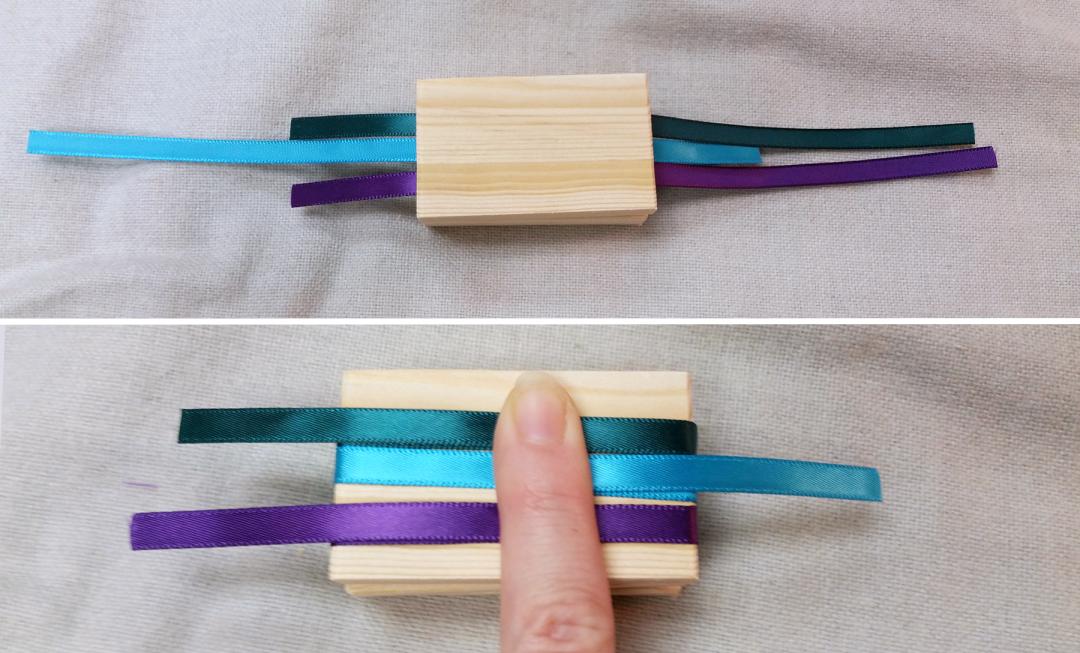
Place the last be-ribboned block on top, plain side up. Check that the two long are on the side of the one short – and the one short on the side of the two long. Pull the short ribbons tight and fasten them with glue dots, making sure the blocks are neatly lined up. (Top Image)
Cross the long ribbons over the block. (Bottom Image)
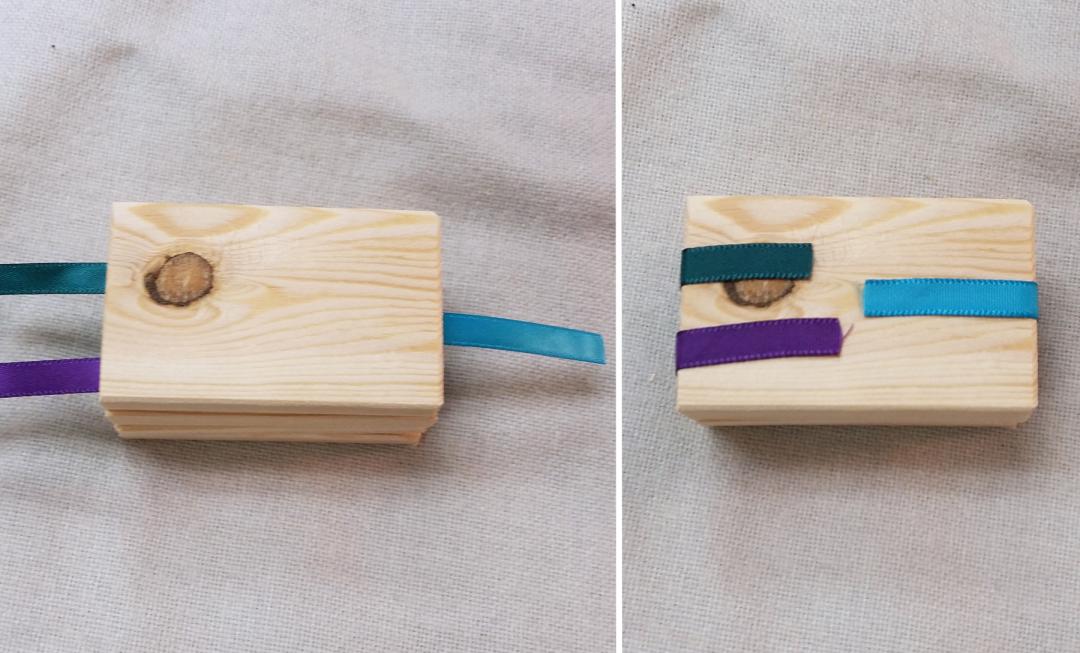
Place the plain block on top. (Left Image)
Pull the ribbons tight and fasten with glue dots. (Right Image)
Voila!
To play with your Jacob’s Ladder, take the end with the single blue ribbon (here on the left) and hold it on the sides with your thumb and forefinger. Turn your hand down, allowing that block to touch the one beneath it. Amazing!! In order to get the toy to function, always remember to press the long single stranded block against the long double stranded block. Some people use these to make snake, alligator, and butterfly shapes. What animals can you make?
Educators! If this activity plan was helful, make sure to sign up for the museum's Teacher E-news for more fun resources to use in your classroom.